FleetTraks Device Installation guide
FleetTraks Device Installation Guide
Below you will find instructions on how to install either of the FleetTraks devices. Also provided are directions for naming the devices in your FleetTraks account and syncing your vehicle’s odometer to your new device. New customers are strongly encouraged to call On-Board Customer Service. Your account manager will introduce you to the features contained on this page and set up a date for additional training.
Existing customers are also encouraged to call support or follow the instructions provided below. If at any time you have questions, please contact On-Board Customer Service.
Support and training are always provide at no charge.
877-340-0300 x 290 support@on-board.com.
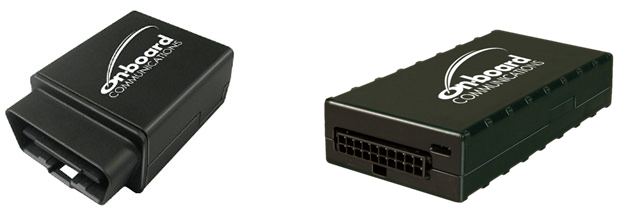
OBC OBD II Plug In Device

The plug in device is easily installed by connecting the device with your vehicle’s OBD II connector.
- Your first step is to make a notation of the device’s ESN number. This will be a 10 digit number.
- Determine the location of your vehicle’s connector, follow this link https://www.carmd.com/wp/locating-the-obd-2-port-or-dlc-locator/. After locating your connector, plug the device in.
- Your device was shipped active and ready to report. Allow up to 10 minutes for the device to establish its initial connection. A successful connection is indicated by solid illuminated lights.
- Either call On-Board Customer Service for help setting the device up in your FleetTraks account, or follow the naming instructions that are provided below.
FleetTraks Hardwired Device
![]()
The hardwired device is installed typically under the vehicle’s dashboard by tapping into 3 wires in the vehicles electrical system.
- Prior to installing the device, make a notation of the devices ESN number. This will be a 10 digit number.
- Detailed installation instructions can be found by clicking here.
- Your device was shipped active and ready to report. Allow up to 10 minutes for the device to establish its initial connection. A successful connection is indicated by solid illuminated lights.
- Either call On-Board Customer Service for help setting the device up in your FleetTraks account, or follow the naming instructions that are provided below.
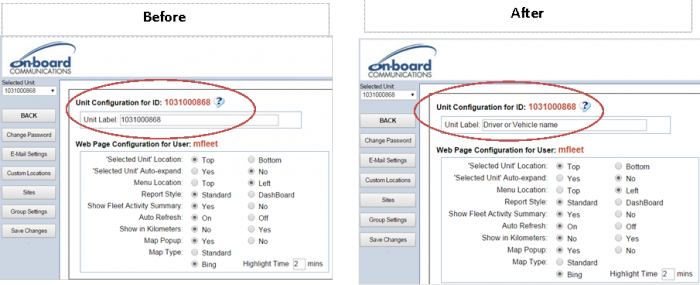
Naming the Device in Your FleetTraks Account
Naming the devices in FleetTraks is easy. First log into your account and go to the administration page. Next, the drop down window will show the all of the devices assigned to your account. Select the number that matches the ESN number that you previously noted. When a unit is shipped from On-Board Communications, the unit label is the same as the unit’s configuration ID (ESN) number. Next, rename the unit to something more appropriate for your business such as (Dave’s Van, or Truck 239). Once you type the name in the “Unit Label” cell and click the “Save Changes” tab, the new name will then be displayed throughout the web application on all appropriate pages. See the before and after image below.
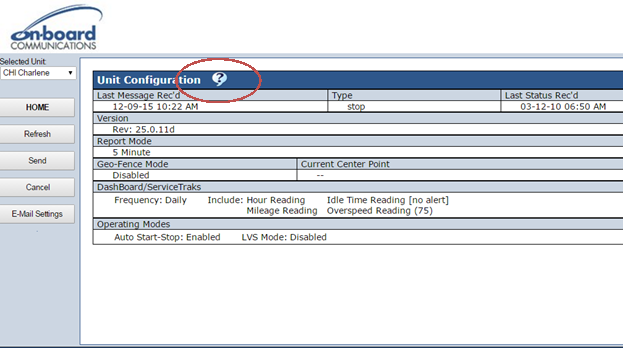
Setting The Devices Odometer Counter
Detailed instructions for setting the GPS odometer are found in the help section of your FleetTraks account. From the home page, click on the configuration tab. Then click on the help link (question mark). A new window will appear. Click on Set Unit Odometer Counter option.